Nightmare on Elm St.

The journey of turning the nightmare we bought on Elm St. into our dream home...

My blog has moved! Redirecting...

You should be automatically redirected. If not, visit www.nightmareonelmst.net and update your bookmarks.

Friday, July 22, 2005

No dry basement today...

After being up past our bedtimes every night this week getting ready for the basement waterproofers, they called this morning to say that they had been held up on another job and wouldn't be able to make it out today after all. Like they couldn't have called us last night and told us that!!!! The Mr. was pretty upset, but this is the way it goes when you work with other people, I guess. We're now rescheduled for Monday, August 1st.

Wednesday, July 20, 2005

New round green friend

This isn't specifically house-related, but it's at least entertaining. ..
Last night, the Mr. and I started boxing up some of the stuff in the basement to make room for the waterproofers. I came across my fun 65cm diameter Target exercise ball while cleaning out one corner, and started dribbling it for fun. This sent Sandy (yellow lab randomly pictured below) into a frenzy. Soon, the Mr. and I had developed a game where we would bounce the ball back and forth to each other, with Sandy "volleying" it to us with her nose sporadically. (Sometimes, she just sat there and it conked her on the head.) Then, it got away from us, and she started attacking it. (I wish that I'd had my camera.) She put her front paws on the ball and repeatedly tried to bite it, then she tried to jump on top of it. It looked like she was trying to "romance" it a couple of times. Sometimes it would wind up against the wall, bouncing slightly and she would get in play stance with it and attack it. I really don't think that she knew what to make of it at all. All of this behavior terrifyed poor Chester (the bloodhound mix), who hid upstairs under the dining room table and wouldn't come out again until he was sure all the commotion was over. The Mr. kept saying she was going to pop it (which she did not) but it would have been a good $20 worth of entertainment if she had. Who said cleaning out the basement can't be fun?

Tuesday, July 19, 2005

Mulling over the basement ceiling

The Mr. and I are considering using ceiling tiles in the basement remodel. We want to box in the ductwork with sheetrock, but we'd like something a little more interesting for the body of the ceiling because it's so close to our heads.
We like both of these options from Armstrong:


tintile


and wellington (which is available stock at our area Lowes- I think)


Has anyone used these products? What do you think? I like the idea of not trying to finish the sheetrock on the ceiling, flat on my back with dust up my nose and in my eyes...

Monday, July 18, 2005

Help us with gutters

I was hoping that I could tap into the wonderful community of expertise and remodeling research to get some information about gutters. We currently have half round alumnium gutters on the house. We've been having a lot of problems with them (it's difficult to get to the ones on top for cleanout) and they aren't connected to the duplex neighbors' gutters, so water pours down the house where there are gaps. We had a roofer come out and look at the roof leaks, and asked him to assess the gutters (we were hoping that they could just be repaired). He said that would just be throwing good money after bad, and that we should consider the square boxy aluminum gutters instead of replacing with half round because it would be cheaper, they would work better, and the "half round hangers are really expensive and hard to find". I have no experience with any of this. We're going to get some more opinions and estimates, but any information you can provide would be helpful. Here are my main questions-
1. How do we know that we really need new gutters? How do we know that ours really can't be repaired?
2. How much more should we pay for the half round style? I'd really hate to go to the other type of gutter, the half round is more period-appropriate, and the other half of the duplex has half round, so I think that the boxy kind would look weird.
3. Does anyone have any opinion of those leaf guard systems? We have a gigantic long needled pine tree, and that's what's causing most of our clogs. It seems these systems work better for bigger leaves and that the smaller debris is what causes the problems anyway.
4. Are half round hangers "really expensive and hard to find"? I found them in a google search on the internet in about 5 seconds, and it copper too, but maybe this guy knows something that I don't.
5. The Mr. wants to price copper gutters, which would be beautiful, but I think too extravagant. Has anyone looked into this option? How much longer do they last than aluminum gutters?

Thanks for your help everyone.

Sunday, July 17, 2005

Our philosophy...

I thought that it was important to talk about our philosophy on home improvement. I don't want anyone to get the idea that we don't like to tackle projects ourself, that we just hire people to do everything- but a lot of the stuff we've dealt with in the house required professional know-how that we don't feel like we have. We want things done right, and we're planning to attack several projects (the basement remodel after the waterproofers leave, for example) alone, but things like floor refinishing, porch replacement, new gutters, the water line installation and the water issue in the basement were way over our heads.

This being said, I just bought the Mr. this on Friday night-


He is mine now... bwah hahahaha!

Kitchen organization

Lest you think that I was totally idle on Saturday, while the boys were working so hard to demolish the basement, I went to Lowe's to meet with the kitchen planner about adding a small desk with a filing cabinet to this corner of the kitchen. We find that papers that need to be filed downstairs just pile up in the kitchen, and I don't have a good place to pay bills, so this seems like a logical use of space. (The dog's water bowl will relocate after the desk goes in).

I'm so glad that I met with the kitchen planner. She had a lot of good ideas, like the two furniture legs on the desk part of the cabinet, and pulling out the desk part of the cabinet slightly to emphasize it more. It's hard to tell exactly what it will look like from the picture, but I'm excited.
I chose a cabinet with a big file drawer and a smaller drawer I can use for envelopes, stamps, checkbooks etc, combined with two knee drawers under the desk top. I decided on a decorative wall cabinet where I can put my cookbooks and a small stereo (which will be very nice!). The only hitch was that Kraftmaid had discontinued our cabinets in our color- Briarwood Birch in Buttercream. I had to order them in Maple, which was a little bit more expensive, but the nice kitchen designer gave me a discount, so it worked out to be the same in the end.

I also chose Dupont Certified Santa Cecilia granite (also from Lowe's) for the desktop. I would have liked to use the same butchers block as in the rest of the kitchen, but the oil in the wood makes its use with paper pretty messy (we already have problems with this when we leave the paper or the mail on the countertop). There also is a chance we can use a remnant of granite, which would save a lot of money. I should hear early next week if this will be an option. I ordered the cabinets on Saturday and they take about a month to arrive. Hopefully, we'll be able to handle the installation ourselves. I'll keep you posted on the progress of this project!

In related news, we met with a flooring contractor to talk about what we can do with our poor old hardwood floors. (Splintering, holes, and finish coming off are all problems that plague all of the wood floors in the first floor of the house- they were coated with poly before the house was sold, but the coating starting coming off within a few months of moving in. The dogs are pretty hard on all floors but they've destroyed these in a year!) Last spring, we both got really sick of the splinters and had a tile estimate done for just the kitchen-- $5ooo! Saturday, we found out we can refinish all floors on the first floor and the stairs for about half that price. We were really surprised- we thought that the floors were too far gone to fix, but the refinisher assured us otherwise. He said that they were like antiques and would never look perfect (we wouldn't want perfect new floors anyway), but could certainly be smoothed out and refinished to showcase their beauty (and not give us any more splinters!). We will have to stay out of the house for a few days while the floors are refinished, so that will be a pain but I can't wait to see what it all looks like when they're done.

Nightmare #2: The basement (part 2)

We were very lucky to work out a deal by which the Mr. traded a Sunday afternoon of work on Dr. P's race car for a Saturday afternoon of demolition in the basement. Here are some highlights-

Dr. P gets a little inspiration from some malt liquor during a break in the demo work.

Dr. P shows that he's not such a "lil' guy" after all by ripping nails from the wall with his bare hands.


The Mr. admiring the beautifully demolished wall...

The guys worked so fast that I all had to do was help load the truck and ride with them to the dump to haul away the trash. The dump was crazy- I wish I'd had my camera. We were there just as they were closing, there were buzzards everywhere, and a giant machine with big spikes was running over all of the trash to compact it into the ground. The holes left by the spikes were so big that we had to be careful not to fall in them because they would have made us fall down. $23.80 and 10 minutes later, and the basement walls were a distant memory...


Then, it was time for a nap...


Nightmare #2: The basement (part 1)

After we'd lived in the house for about a month, we had the remnants of a hurricane move through and got about 5 or 6 inches of rain in the process. We were very unhappy to find that the carpet in our basement was soaking wet along the back wall. Thus began the next nightmare, the basement. We'd never know when it was going to leak! The worst leak occurred last month when I watered the hostas along the side wall of the house. It was then that we decided to rip the paneling off the wall and see what was going on with that wall. We have a big crack, but it also seems that the joint between the wall and the floor is leaking. After a lot of research, it appeared that our options were to chisel out the joints and fill them with hydraulic cement (a BIG job, it's a long wall) or dig out the foundations and add more drainage (this had been done previously, apparently). Either way, it was too big of a job for us, so we called a waterproofing company. They said that our best bet was to let the wall leak and put in drains to a sump pit in the rear of the basement. This way, the water will come in but be directed to the sump pit and pumped out. Hopefully. The price was reasonable, and guaranteed, so we've decided to go for it. The company starts the work next week, so this weekend we had to finish removing all of the framing and walls from the area to which they will need access.

The basement before:


Our friend Dr. P was nice enough to come and help us on Saturday afternoon... blogger image uploader and I aren't getting along so please see part 2 for the demo.


The Water (part 2)

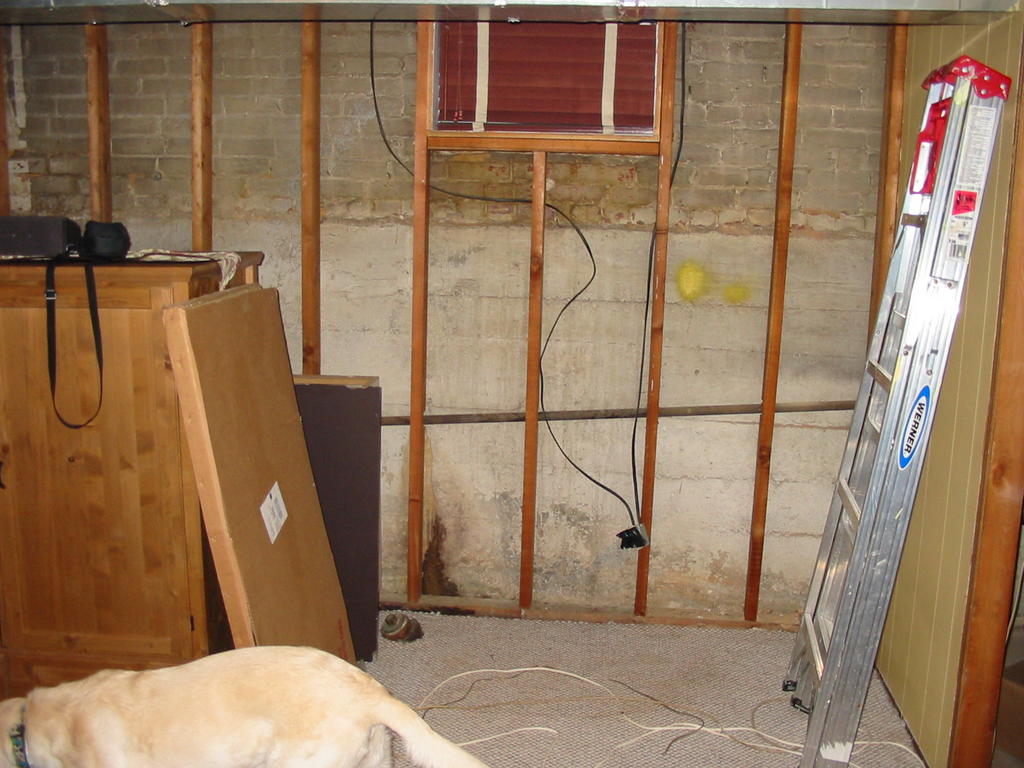
Yay! The new water line into the house!!! The plumbing is all connected, but we're still working out some issues with the repairs to the sidewalk. Hopefully, that will all be taken care of by the end of the summer.


After the plumbers left, we had a huge hole where our perennial bed used to be, so we decided to start back over with new plants. I left work early one day and the Mr. and I went to Stadler Garden Centers and purchased $400 worth of plants. I then sent him to Home Depot to buy a soaker hose to bury in the bed with the plants, figuring that would make watering the large bed easier. He comes back 2 hours later with componets for a sprinkler system. We spent the next three days knee deep in mud attempting to assemble this sprinkler system. We learned a lot of important things:

1. Rainbird sprinklers do not work with any other brand of flexible plastic tubing. This was okay, we just switched to regular PVC pipe.

2. PVC pipe from Lowes will not necessarily fit into connectors from Home Depot.

3. No matter what, you will have a million of the wrong connector and none of the right one.

4. We finished this job in the dark at 10 pm on a Sunday night. The neighbors thought that we were nuts.

The front yard now- we mowed and overseeded Saturday (I took this pic on Friday.)


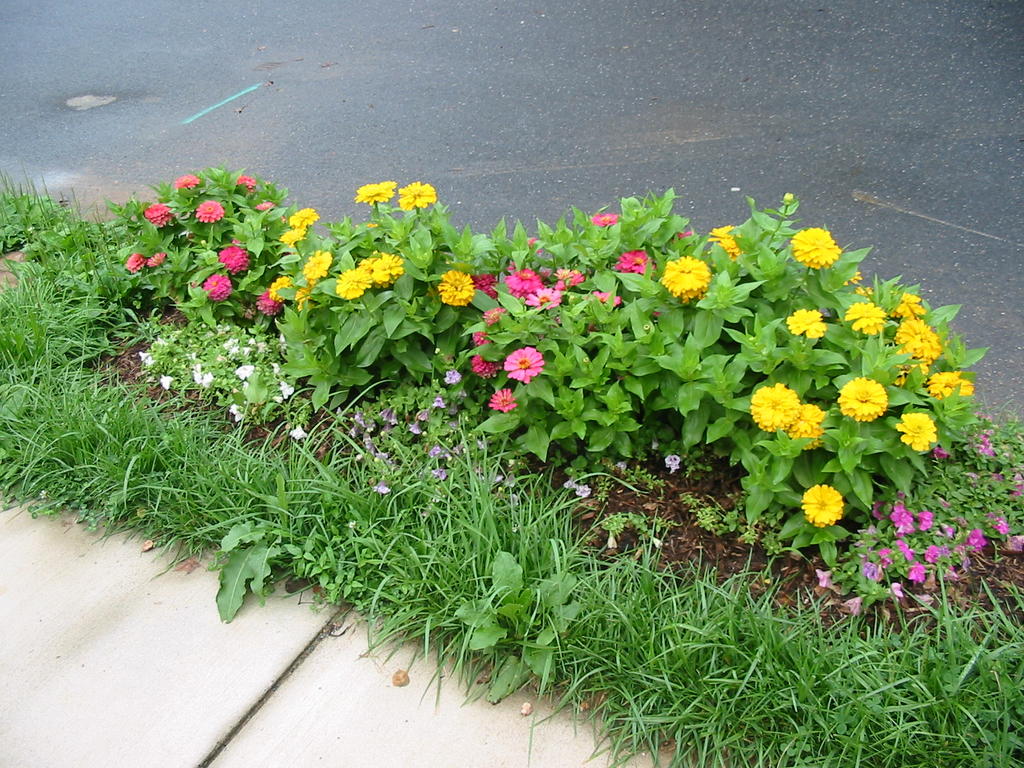
The perennial bed- for our first year, we think it looks great! If I could just win the war with the japanese beetles it would be even better (I've never seen them this bad! We took a walk tonight and they're eating these huge elm trees all over the neighborhood- the streets are littered with little lacy leaf carcasses)


At some point, there were giant stepping stones out in front of the house in this area. I discovered 3 huge ones while putting these flowers in. It was a lot of work digging out these giant rocks. Why would you bury giant rocks? Again, we mowed Sat. after the pic was taken and it looks a lot better. We're happy to say that the front yard landscaping is complete!


Saturday, July 16, 2005

Nightmare #1: The water...

We had a through home inspection before we bought the house, and other than the issues with the electrical and the cosmetic issues that we addressed right after we moved in, we thought that the house was in pretty good shape- supposedly new plumbing, new HVAC, new electric, etc. etc. We were happy! Then, we started having more and more problems with the water pressure in the upstairs bathroom. It seemed fine during the home inspection, but after we moved in, we noticed that it was pretty wimpy, the water was a little rusty at first, and it took FOREVER to get hot. We had new pipes, so we couldn't figure this out. We started calling plumbers and all said the same thing- you need your main water line into the house (it was still galvanized, and had not been replaced yet with copper) replaced. This is not cheap. The people on the other half of the house understandably wanted to wait until their baby was a little older before we did the work because of the chance that it might affect their water service. So, we showered in the tiny basement shower all fall, winter, and spring. We finally got agreement from the people on the other half of the house to do the work this summer. The plumber had to use a torpedo thing to drill a hole from our basement out to the street and then thread the pipe through it. Then they dug up our sidewalk and our front flower bed and connected the new pipe to the water main. It was pretty spectacular equipment, and the work only took one day. When they left, and I went upstairs and turned on the shower I was very impressed with the pressure, but the water was still freezing (we had been under the impression that the water moved so slowly through the pipes that it cooled off before it reached the upstairs shower.) I flipped out and called the Mr. to come home from work- we start throwing around ideas- rip out the walls and insulate the pipes, add a 2nd pressurizer tank for the 2nd floor, etc. etc. When the Mr. got home and started playing with the faucet, trying to figure out if it was an issue with the mixing valve, he suddenly figured it out---
Mr. DDP had crossed the pipes when he connected the shower faucet. And no one ever figured this out until now- not the realtor, not the inspector, not the 4 plumbers that had checked the place out, and obviously not us or any of the visitors to our house that had taken a shower. No one. Oh well, at least it works now.

Upstairs back porch/backyard

Here is the replacement window from the bathroom:

Here it is from the upstairs porch. As you can see the trim around the window was all removed when the replacement was installed.


As you can see here, they added foam insulation to fill the gap between the top of the window and the top of the window frame and then painted it white. Did they get this window on sale?? I just can't figure out why they didn't use something that fit better.


Here is a general picture of the upstairs porch. Our neighbor tells us that the DDPs were pretty surprised at how rotten it was and did a quicky redo on it to sell the house last year. Most of the porches in the neighborhood look like the one next door, in the background, so we plan to ditch the deck flooring and wrought iron rails in favor of nice pine floors and wooden railing and posts. We're having a carpenter estimate this project soon, but we have some other issues to address first.

This is a general picture of the backyard. Mr DDP was an architect (not a carpenter) and apparently designed the pattern that the patios would take. This will get reworked somewhat when we redo the porches because we're going to lose the deck (not shown) below and scale it back to the oringal porch size. This means that we will have to do something with the patios because there will be a big gap between the porch and the patio. Also, while they look cool, the patios aren't really functional in their current shapes and sizes. A large rectangular patio would be more practical for entertaining. We're going to fence in a little "room" in the corner of the backyard with the tool shed and wheelbarrow because we have no garage and the lawn equipment won't all fit in the basement. So the back patio will get ripped up this summer- probably soon. The fence contractor is scheduled to start in early to mid August. (We're having the fence replaced with a taller one because one of the dogs can jump it.)


Upstairs bathroom (part 2)

This is a picture of the top corner of the bathroom. This trim is pretty representative of the DDPs craftsmanship. As you can see, nothing lines up properly, they didn't caulk the joint between the wall and the trim, you can see a big hole near the tile, they didn't use edge finished tile for the edge of the bath (the grout is also chipping out of the joints along the edge where it meets the wall), and you can see the greenboard through the paint. This room will someday get a complete overhaul. When we have more money.

I have more pictures, but that's about it for the bathroom. One last thing- they removed the original bathroom window and replaced it with a new vinyl window. It doesn't really fit the opening created for it and it leaves a nice gap on the other side, as you will see in the next post. We would like to correct this at some point. We've decided there is no point in ordering a window that fits better since we plan to redo this room someday.

Upstairs bathroom (part 1)

The upstairs bath is servicable, but has a lot of... issues.
At first glance, it seems nice- not period appropriate, but nice!

Then you start looking more closely- the DDPs installed a self rimming bathtub, but it didn't fit in the space allocated for the tub, so they tiled around it. This means that you have a nice channel that traps water all around the back of the tub, so hence the clear cushion.


The bathroom faucet is missing the little things that say Hot, Cold, Waste. I have ordered replacements from Kohler, but it's been a month and I still don't have them. I hope that they show up soon!

I have some more pictures, but blogger isn't cooperating with me, so more tomorrow!

Guest Bedrooms

These pictures of the guest bedrooms are kind of dark but they will suffice. Not much has been done in the guest bedrooms besides painting. The periwinkle bedroom is the center bedroom, and the green bedroom is the back bedroom.


The porch off of the back bedroom has a lot of issues. In order to sell the house, the DDPs did a little... work on it. As you can see, rather than bothering with attaching the threshold to the new porch floor, it was just cut off (and not even flush with the threshold plate!) You can stand and bounce on the threshold quite a bit. The back porches are on the list for this year.

Master bedroom

The master bedroom is situated at the front of the house. It has five wonderful windows and gets a ton of morning light. You only need an alarm clock for rainy days!


As this is an old house, we have very little closet space (more on this later). Hence, the IKEA wardrobe. I hate how it dominates the room, but it's a necessary evil. I'd love to change it out for something more period-appropriate.


More views of the master bedroom

When we moved in, all the trim and the closet door was covered in this... ahem! interesting faux finish. When I first saw it, I asked the Realtor- what did the trim do to her to deserve this. The walls were painted a lovely complimentary peach. The next door neighbor saw me painting it out the night we closed on the house, and she still tells everyone how funny she thought it was that that was the first thing I chose to change.


The Mr. complains that I have the biggest closet in the house, which is hilarious, because look at it...

It's much deeper than any of the other closets in the house, but that doesn't help much, because I can't reach the back rack very well. And it's very very short. I'm 5'7" and I have to sort of duck to get things out of it.


Work already completed in the master bedroom-

-Repaint walls and trim

Work remaing in the master bedroom-

Address issues with floor

Figure out better solution for closet

Friday, July 15, 2005

Living Room

The living room is pretty much the same as the dining room. While the plaster has some serious issues, we skim coated it pretty well before we painted, so we could do some more plaster work, but otherwise the room just needs a little furniture and a new rug. The taupe is much better than the mustard yellow in my opinion!
I dressed up some $10 Wal Mart roman shades with red ribbon after I saw how much something similar was from Pottery Barn (and they didn't have the correct sizes!) I think that it looks pretty good.
The Mr. accidentally got into this picture!
One interesting thing about this room- the stairs originally wrapped back around themselves and opened up facing the other wall. I think that the previous previous owners were the ones who changed it. I think that it was a good idea- it really opens up the room (see below) but it definitely left an interesting pattern in the floor.

Work we've completed in the living room:

-Some plaster repair

-Repainting

-Dressed up and hung Roman shades

Work remaining in the living room:

-More plaster repair

-Address issues with the floor

-Obtain furniture to hold media for the back wall

-Repair missing staircase pieces

Dining room

The dining room is in pretty good shape currently. We're pretty happy with the way that the paint effect (darker on the window wall, lighter on the other three walls) turned out. We need a real china cabinet for this room someday, and we could stand to do some plaster work, but this room is not a top priority right now. The floors would be addressed at the same time as the kitchen floors.


Work already completed in the dining room:

-preliminary plaster repair

-painting

-remove curtains and install Roman shades

Work remaining in dining room:

-continue plaster repair

-purchase new furniture

-address issues with floor