Nightmare on Elm St.

The journey of turning the nightmare we bought on Elm St. into our dream home...

My blog has moved! Redirecting...

You should be automatically redirected. If not, visit www.nightmareonelmst.net and update your bookmarks.

Friday, April 21, 2006

Welcome Washington Post Readers!

We feel very honored to have been chosen for an article on houseblogging in the Washington Post, along with our good cyber-friend The Home Improvement Ninja. Here's a link to the article for all of our loyal readers-
Link to Washington Post Article.
To those of you who have found our site from the article, welcome! Take a look around through the archives, and we'd love to hear what you think!
-Amanda and Aaron

Tuesday, April 18, 2006

Drywall Dilemma and the State of the List

First of all, it was a VERY productive weekend. We had tons of help from Aaron’s parents, and even managed to have a nice relaxing Easter weekend in the process! Thanks, J. and B.!

1. Finish plumbing to redirect heating exhaust and mortar in new concentric vent
2. Finish plumbing redo behind washer
3. Install door headers on back door and closet door
4. Finish building wall on other side of closet double door
5. Install closet double door header
6. Redo window framing (oops again)
7. Extend wall behind laundry sink (triple oops)
8. Finish toenailing by hand along door headers
9. Run all cable, speaker, and telephone lines to low voltage box (only 2 phone lines remain- should take 10 min or so to complete)
10. Sink all walls into floor with Ramset (only 1 remaining- need to move a big pile of stuff to get to it)
11. New addition- make stabilization blocks for outside corner of bay window bumpout framing.

Not only did we do all of that, but we rescreened every single window in the whole house and the back door! I'll put up a post about that later this week.

Now, the dilemma… we’ve read good things about the new paperless wallboard product DensArmor Plus, especially for damp locations like basements and bathrooms. It’s a little bit more expensive, but not terribly so. What bugs me is the texture of the front of it… it’s very rough. I love our smooth(ish- but that’s another blog post) plaster walls upstairs, but I’m fine with the smoothness of regular drywall as well. But, rougher than that? I’m not sure. Also, I’m not sure if this stuff will actually finish like regular drywall as the manufacturer claims. (Like will the joints be noticeably smoother than the rest of the wall when we’re done.) What’s your opinion? Either way, we’ll go with a moisture resistant product… it’s between the regular old greenboard and the paperless drywall. Another survey is posted below for your votes! Any general comments on drywall are also appreciated!


Create polls and vote for free. dPolls.com

Thursday, April 13, 2006

Ahead of the game

Tonight we decided to tackle another project from THE LIST- that dreaded window header project. In trying to decide why we've dreaded this project so tremendously, we think that it was just because we had to remove some framing, which always sucks! The project went exceedingly smoothly, for a change!

Here is the window header with our bad framing removed:

P4133678


This time we ACTUALLY MEASURED CAREFULLY!

P4133680


We still had a few remnants of our old framing to deal with, at least Aaron has the tools for this nail removal job!

P4133682


Aaron made a lot of cuts, and a lot of recuts, to get everything perfect!

P4133686


We added my Dad's secret weapon for the final assembly- wood glue!

P4133690


Final installation...

P4133694


And finally... (drumroll please) a solid, level windowsill!

P4133692


Woo hoo! List, you're going down! Grunt work strikes again!

Tuesday, April 11, 2006

Progress... and Top Ten

We've made good progress on THE LIST tonight...
I've run 3/5 phone lines (I ran out of phone wire), I ran all the speaker wire for the basement, but I still need to run 2 lines outside for the backyard speakers. That all went pretty quickly, and it was nice to get those things checked off. Aaron removed the studs that we need to redo around the window and got ready to start that either later this week or this weekend. Keep your fingers crossed for us everyone, I can see the end approaching! Those tears of joy are right around the corner... hopefully.

Additionally, since all the cool kids are doing it, I thought that I'd say how deeply honored I am to be included in the Top Ten Sources for Houseblogs, especially with such esteemed company, all of whom I read obsessively.

Also thanks to everyone who commented on our cabinet hardware issue. I've since fallen in love with the following from Restoration Hardware:


They won't be cheap, but they're worth saving for... so thanks everyone for all of your great suggestions and your votes!

Sunday, April 09, 2006

The Bronze Dilemma

I made very little progress on my list yesterday, however, I did go out to do a little shoppingresearch on materials for other projects that we have in mind. Aaron and I are both unhappy with the hardware on the kitchen cabinets. The satin nickel finish is rubbing off of the knobs and pulls, and we don't feel like the style (especially of the drawer pulls) really goes all that well with the kitchen in general. Here is a general picture of the kitchen:


P4083583


While browsing the selection of knobs (I was just at Target, not one of the home centers), I kept finding myself drawn to the oil rubbed bronze selections. All of the original hardware in the house has the oil rubbed bronze look (although it is probably something else, like really dirty brass), and I really like it. Also, the warmer color would probably better compliment the buttercream cabinets and butchers block countertops. However, we have all stainless and black appliances (as shown above) and an unfinished tin ceiling. So, the silver color might be a better option.

Here is a photo of the old knobs and a simple oil rubbed bronze one that I picked up:

P4083578


Here is a picture of the old cabinet pulls and a new one in satin nickel:

P4083581


and again in oil rubbed bronze:

P4083579


So, now thanks to Laurie and Eric from 1951 Ranch Redo, I've got this cool poll that you can use to vote. You're also welcome to leave comments if you have more suggestions. Thanks for your help!


Create polls and vote for free. dPolls.com

Saturday, April 08, 2006

Patios and Progress Report

First, we've been busy trying to get ready for drywall. The current state of the list is as such:
1. Finish plumbing to redirect heating exhaust and mortar in new concentric vent
2. Finish plumbing redo behind washer
3. Install door headers on back door and closet door
4. Finish building wall on other side of closet double door
5. Install closet double door header
6. Redo window framing (oops again) [demo started]
7. Extend wall behind laundry sink (triple oops)
8. Finish toenailing by hand along door headers
9. Run all cable, speaker, and telephone lines to low voltage box
10. Sink all walls into floor with Ramset (only 3 sections remain!)

Aaron is out of town, so I hope to tackle the rest of the demo on 6 and some of 9 this weekend by myself. The rest are really two person jobs.

Redirecting the heating exhaust was one of the most frustrating jobs that we've ever tackled on the Nightmare. It was just a really, really odd angle, and we needed to leave enough room to pass through so we could get to the electrical box. Here are some pictures of the job that we started last Saturday and finished on Thursday night:
In progress...

pipe1

Completed!

P4053576

While this ended up taking us a very long time and was very frustrating, it was definitely worth it to do it ourselves b/c the estimate from a local HVAC company to do it was $700!!!!!!!

In other news, we've been starting to gather estimates for a new, more functional patio and some retaining walls for raised beds in the backyard. We have a gorgeous stacked stone retaining wall in the front yard and we would love to duplicate this look in the backyard. Thus far, we're getting quotes for flagstone and slate, and they're coming out pretty high. We'll keep you informed as this project progresses. We have learned though- we won't start this project until we feel like the basement is nearly complete. We may be optimistic in assuming that we'll be done with the basement in June, though!

Friday, April 07, 2006

Powder Actuated Nailers

Aaron's latest post on Powder Actuated Nailers is up over at Toolspotting.net!

Wednesday, April 05, 2006

Headed off at the pass...

As I mentioned before, we put my poor, unsuspecting dad to work on the house this weekend making door headers. I didn't realize how detailed the process to make them was, so I took pictures for all of you that might be able to benefit from the experience. However, if you're framing in a room with a low ceiling, make sure that you double check all of your measurements before you start the headers.

Materials list
2x10 (or whatever you plan to use-- enough for both sides)
3/8" plywood, cut with circular saw or table saw to same width as 2x10
1x4 (enough for both sides)
nails
wood glue

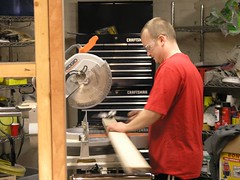
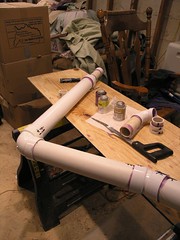
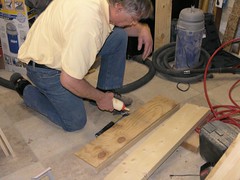
Cut all the wood to the desired lengths for your door header.
Repeat for all the headers that you plan to make.
Stack all of the parts together for each door.
Then move on to assembly.

First, put wood glue on one side of both of the 2x10s

header1


Next, make a plywood sandwich with the two pieces of 2x10 on the outside, the plywood on the inside.

header2


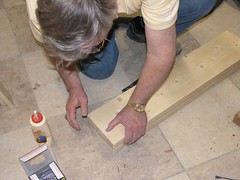
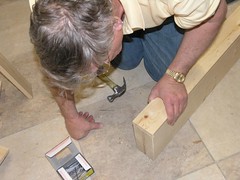
Line everything up as carefully as possible, and then nail (we were out of framing nails, and used finishing nails instead) opposite corners to secure the header together while you continue assembly.

header3

header4


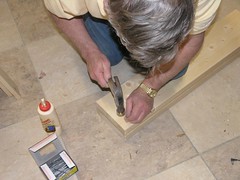
Turn the partially assembled header up on one side, and apply glue to the side. You can use a hand plane to smooth it out first if it's really irregular at this point. (We didn't have a plane, so that wasn't a possiblity for us.)

header5


Next, apply the piece of 1x4 that you cut to the header.

header6


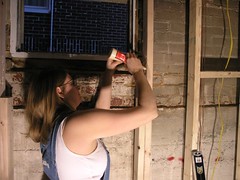
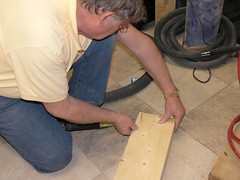
And secure with a couple of nails at either end

header8

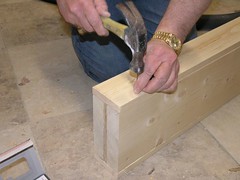
and repeat for the other side...

header7


I didn't get pictures, but we drove about 8 nails through each face and 4 nails on the top and bottom of each header with the nail gun to finish it up, and- Voila! Completed header!

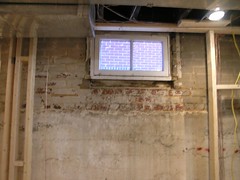
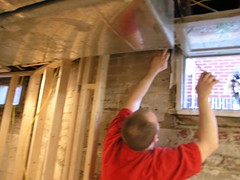
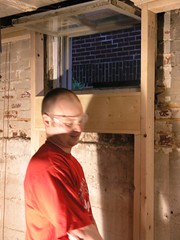
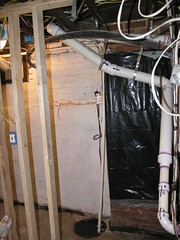
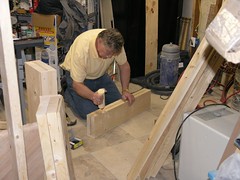
Next, cut studs to fit under the header and on top of the bottom plate. We checked to make sure that the header would fit, then secured these on both sides with a few nails. Then, we lifted the header into place. The fit was a little snug, and it required a little persuasion to get into place. Then, we got as many nails in the structure with the nail gun as possible. We still need to buy some more nails and hand toenail the top on both sides. But, one header is done! Thanks, dad!


P4053577


Oh, and Aaron's latest post is up at Toolspotting. It's a review of the miter saw cart that he's been using for several months now.

Toolspotting.net

If you haven't checked out toolspotting.net yet, you should definitely do so! Aaron is one of the contributors, and he has had a few new posts up lately. I will start posting links from this blog in case our readers are interested.
Aaron's recent posts-
Hammernet
Magnetic Measuring Tape Holder

It's a little confusing, because Aaron from House in Progress is the site's creator and most active contributor, so Aaron's posts are listed under "Aaron Forster" to avoid confusion! As an aside, this brings the total of Erin/Aarons that we know (or cyber-know) to 6. Team Aaron/Erin unite!

Tuesday, April 04, 2006

So close you can taste it…

Well, at least I’d like to say that…
Dad visited this weekend and showed us how to make door headers. I’ve got pictures of that to show those of you who may want to know. Unfortunately, we realized after we’d made up all of the door headers that they were too big, and we’d have to cut them down. Oops. This one was my fault- in our calculations; we were using 72” tall for the doors, when they’re actually 80” tall. Oops. So, anyway, we made door headers and then cut them back down. They’re all waiting to be installed. We won’t have any room for crown molding, but we should be fine for the door and window casings, which is good. I may spice them up a bit, since there isn’t enough room to match the ones in the rest of the house, so I can be creative. Period-appropriate, but still creative. More on that later.
Anyway, we now have a manageable list of things to do before we can be ready to drywall-
1. Finish plumbing to redirect heating exhaust and mortar in new concentric vent
2. Finish plumbing redo behind washer
3. Install door headers on back door and closet door
4. Finish building wall on other side of closet double door
5. Install closet double door header
6. Redo window framing (oops again)
7. Extend wall behind laundry sink (triple oops)
8. Finish toenailing by hand along door headers
9. Run all cable, speaker, and telephone lines to low voltage box
10. Sink all walls into floor with Ramset

I’ve said before that I will cry tears of joy when the drywall goes up! Let’s see if I can be held to that promise anytime soon! Aaron’s parents are coming Easter weekend to assist us with the drywall, so it would be ideal if we were ready to go then. However (there is always a however), Aaron has a trip out of town planned this weekend, so it may not happen. I guess that I need to accept that this “winter project” is rapidly also becoming a “summer project”. We had hoped that we would be able to redo the back porches this year, but we’ve got this one project at a time rule, so we’ll see. We may break that rule to ready the backyard for patio installation though. I made several inquires at different patio construction companies today, so hopefully I’ll have some messages from them when I get home tonight.
As an aside, I’m not feeling my blogger standard template anymore. Does anyone have any suggestions/advice on customizing it? I’d like something more unique, but I don’t have any mad internet skillz. I’ve searched around a little bit, but haven’t found much that I liked. Thanks in advance for your help.