Mixmaster Mike Redux
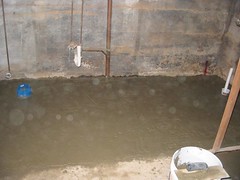
The guys at Rentals Unlimited laughed when we pulled up on Friday to rent, you guessed it, the jackhammer and the cement mixer. Again. Blech. You know, some people actually go on vacations with their vacation days. Not us. Noooo. We take days off to work on the house. This time we took out the old shower drain and made a great big hole so that we could run the drain for the new clawfoot tub. We were surprised to find that the slab was over 4” thick in this area, but that was a pleasant surprise, b/c we were going to rip out all the concrete that would have been under the tub and pour it to 4” to ensure it could take the weight of the filled tub. So, there we go. Pleasant surprise from the Nightmare. Wow, those are rare.
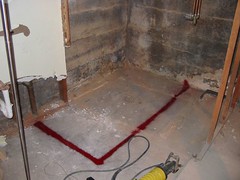
Outline of where tub will go...
So, you’ve seen it all before. I have some pictures, I may post them later. Aaron forgot to take a picture before we started pouring concrete, so we don’t have any of the pipe in the hole, actually, but I’m sure that you believe us. We did get two good tips from a plumbing supply place in town that we checked out. (1) We put a cup over the drain and poured the concrete around it so that we could still access the joint for the drain later. We’ll fill it before we finish everything up. (2) You can stack those little flangey things to raise up the toilet, so we didn’t have to rip that area up.
A picture of the hole... aren't holes exciting???

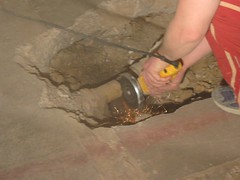
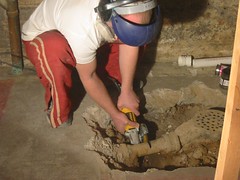
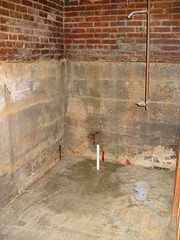
Two views of Aaron grinding off the old pipe. He learned from that exercise with the hacksaw last time!
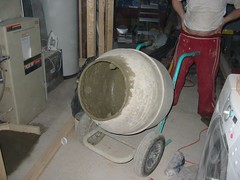
Next, we laid the pipe in the hole (no picture) and poured more concrete. Mixmaster Mike came back (hopefully for the last time) to help.
So, there you go. That’s how we spent Friday and Saturday.
Sunday we were bound and determined to finish framing. For design purposes, we needed to frame an angled entrance to the bathroom so that we could walk past it down the hall and out to the backyard. This was not simple. We spent many hours scratching our heads and making sample cuts. We finally got something that would work and finished framing these two walls about 6:00 pm. We only took a break to sign the papers for our home equity line. (They come to your house for closing now. How cool is that?) We’re really happy about this, b/c we slashed our interest rate by 2 percentage points, and we think that we have a big enough line to finish the basement, backyard, and attic remodels.
General framing shot. Many of these got messed up when I tried to move them to Flickr, so this is the only one I'm posting.
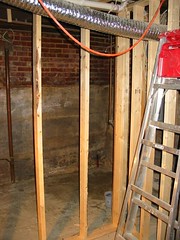
I'll get some better ones this weekend. The camera batteries are dead now.
After finishing the two angled walls, we only had one real wall left to do. We will put cabinets on this wall, so to increase the chances of actually hitting a stud when we hang them, I had Aaron space the studs 8” apart. So, the wall will look strange when I finally post a picture, but it should be strong and hopefully we’ll thank ourselves later. We finished up by 7:00 and then flopped on the couch, ordered pizza, and watched football.
After many trial and error attempts at framing in this horribly unlevel house, we finally figured one thing out that helped a lot. After measuring and cutting the pieces for the top and bottom, we held a stud up to each floor joist that we would hit, on top of the other two boards and marked a line on the board for each joist that it would touch. Then, we cut the board to the shortest length indicated. Then we checked this board in the same manner to make sure that it would fit under each stud. Then we cut all the studs to this length- we usually didn’t measure this, but just marked each stud with the previous one to save time, and it only bit us in the ass once. All of the walls that we made this way went up very easily (before we figured it out, we had a couple get stuck and a couple that we had to shim a lot) and were nice and firm after they were attached and didn’t require any shimming. It was also much faster than trying to measure everything. So, if you’re framing in an older home, this may be a helpful tip for you. We’ve made a tremendous effort to make everything level, plumb, and square, but we had a lot of issues. One big issue that we had is with lumber. Most of it sucks. No framing lumber is older than 7 years anymore, apparently, and most of what we bought seemed fine, but twisted as it dried out in the basement. So, lesson number one is to buy the wood and use it as quickly as possible. (Someone commented somewhere in the past few weeks that Tom from This Old House has said “Level, plumb, or square, pick two.” which made us feel much, much better.) Anyway, drywalling this mess should be an adventure!
We had to rip out the little section we did last week b/c of the issues with the stupid vents from the furnace. It turns out that they were sized incorrectly and don’t have the correct number of bends (I found the furnace installation manual online and we poured over it for hours. It took a combined 17 years of science/engineering higher education to make sense of the stupid thing.) The parts that we need to fix it aren’t readily available so Aaron is meeting with Frederick Air tomorrow morning to get an estimate to move and resize the vent. I hate paying someone to glue PVC together, but we don’t want to screw this up and die of carbon monoxide poisoning. That carbon monoxide poisoning is a bitch. We do have a monitor, but that’s not the point.
Sooo, at least I can report that the framing is about 95% done. We have to put back in the section that is affected by the furnace vent and we have a few door and window headers to deal with, but none of that should be too difficult. We ended up framing out the bathroom for a 30” door so that it would have the clearance necessary to swing into the room. This was very important to Aaron for some reason. I was fine with just swinging it the other way, but he would have none of it! But, this will make for more interesting blog posts because the tub is 32” wide, and it will need to go into the bathroom before the door frame can be finished out. This kind of slows work in the main area of the basement while we focus our attention on getting the bathroom ready for the tub. This will be nice because it will give us a chance to try out a lot of the same things that we’ll do on a large scale in the rest of the basement in this small room. So, over the next few weeks, you’ll see a lot of posts having to do with the bathroom. We’re starting with a tuckpointing post hopefully coming up this week sometime! Oh, and for those of you that have been following, we’ve decided to go with the tin tile style #1 from the post of a few weeks ago.
posted by amanda @ 5:41 PM
![]()


<< Home