Nightmare on Elm St.

The journey of turning the nightmare we bought on Elm St. into our dream home...

My blog has moved! Redirecting...

You should be automatically redirected. If not, visit www.nightmareonelmst.net and update your bookmarks.

Sunday, September 18, 2005

Porch in Progress...

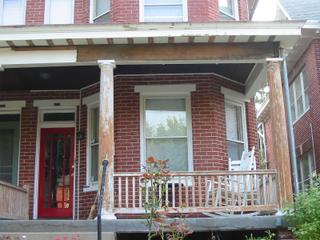
Aaron is working on the porch trim right now. I'm writing between helping him, actually! Here was the progress as of a few minutes ago. It's slow and steady. I can't imagine how the original builders did this without power tools!


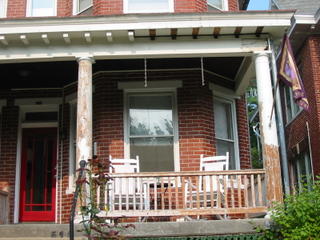
I just thought that I'd post a total front exterior shot- to quote Aaron "It really looks like a Nightmare now!"

You can't get the full effect from a photo, but the painter has stripped almost all the windows and doors on the house to bare wood, which looks pretty ugly. (Yes, we decided to pay a fortune- $320/window to save what we had. And then we added the door frames- $400/each. I wish we had the time and patience to do this ourselves, but with me back in school this semester- (I'm trying the Ph.D. program again- this time at the University of Maryland. I'm starting out by taking solid state physics. I'm clearly insane.) The gutters are down and they've left gorgeous rust stains behind on the fascia boards. The painter sent the gutter people away after they took the gutters down and replaced the fascia so that he could work on the fascia boards, but he's still been working on the windows. We trust him, and he's a great guy, but the gutter people said that it would be an extra charge if they came out twice. Since we didn't tell them to come out twice, the painter did, hopefully we won't get charged the extra fee, but I seriously doubt it.

Oh, here is a good PO story. The painter is also going to reglaze all of the windows, fix the broken pieces of glass, etc. Most of the window glazing comes right out b/c it's very old and brittle. HOWEVER, the PO (DDP, if you recall from earlier posts) thought that window glazing was for suckas, and he thought that caulk, his very absolute most favorite compound in ever the history of remodeling (useful for filling holes in walls, grouting tile, etc. etc.) would be an excellent choice for you got it, reglazing windows (at least just in our bedroom). The painter said that he would try to make it look a little better but there was no getting it out. Thanks DDP!

Gotta go sand more blocks for the trim- like I told Aaron- thank goodness the house was built in the Arts and Crafts period, with its nice simple trim. Our newbie carpenter skills would have not held up to one of those ornate Victorians with the complex trim!

I can't find the bleepin' hammer in this mess!

Yeah, don't try Hello from Picasa. It sucks. (Hence last post.)
Here's a more normal post, with me fighting Blogger's Image Uploader-

It all started b/c we had to replace one of the windowsills in the basement (totally rotted out, only about 2 inches worth of solid wood (hello, leaky basement, nice to see evidence of you again!). So, Saturday morning, the scene was this-


It took a LOOOOONG time to get to this stage b/c it's so difficult to find anything in the warzone that is our basement right now. We've been having this problem all summer long. We pretty much abandoned the space after the walls came down on one side for the waterproofers. There is a LOT of work to do down there, but we've been trying to finish the exterior work before it gets too cold to do anything outside.

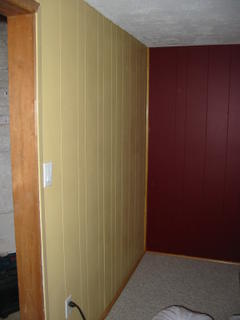
However, I think that it would make life much easier if we had a staging area for the rest of the work. Thus, we decided on Saturday morning to take down the rest of the walls for the area that will be Aaron's workshop when we remodel the basement. Here is a picture before the walls came down-


And three hours and a lot of hammering and crowbaring and sawzalling later-


Isn't demo great! Last night we removed the carpet (peel & stick vinyl will go in there- just to cover up the suspect old 9"x9" tiles) and I started painting the filthy, crumbly walls with this nasty elastomeric masonry paint from the Big Blue Box. It's thick and stinky and our walls seem to slurp it right up. Aaron picked "warm chincilla" which was kind of a light green-gray for the walls, but it turned out pretty depressing- like a stormy January day-yuck. Fortunately, one gallon only got me halfway across the back wall, so I'm going to change it to something a little less depressing (the idea is to WANT to work in there!) when I go back for more paint today. Hopefully, I can get the last section of the wall painted this afternoon while Aaron and his friend try to get Aaron's truck in moveable condition (that' s a story for another blog). I'm just kind of trying to get the first coat on the best I can- the wall is really hard to paint, so hopefully I can do a better job on the 2nd coat. Maybe I'll even get the floor started this afternoon! As soon as the floor gets finished and the walls are painted, we'll put up shelving and pegboard and move the tools in there so that we can get organized. We've been making little piles for each project, but we're constantly borrowing from each little pile for the next project and it just evolves into a huge mess. I'm excited to have a useable space that will make life a little easier.

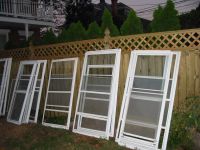
View of new fence and removed storm windows...


The many, many storm windows we've pulled off of the house- stripped screws made this a loud, bangy job! Posted by Picasa

Wednesday, September 14, 2005

Midweek progress report

A quick update- I'll post pics later...
Friday and Saturday we cleaned dust from the floor refinishing off of every concievable surface in our house. I was very thankful for our good friend the Shop Vac! It made everything much easier, and we really needed to clean the ceiling fans anyway, so this was a good excuse. I really wish we had done this before we moved in, but we could barely afford the house last year, so it wouldn't have been possible. It was worth all of the work and money though, because the floors look awesome- it's like a different house. Sunday we finished up the last of the cleaning, and removed storm windows from most of the house (that was a job- at least they came off easily once the screws were out, but every single screw on every single window was stripped and had to be beat upon with a hammer and screwdriver to get it out). The painter started right on schedule Monday, and the work he has done so far looks terrific. I'm so excited to see the end result. We were just going to have the windows stripped and repainted, but now we're extending the work to most of the house. I forgot to take before pictures on Sunday- I was really tired when we got the last window off, but I'll post pictures of the finished work. The gutter guys start today as well, so it looks like most of the outside work on the house should finish before the end of September--- if we can get the porch finished!

Friday, September 09, 2005

And then there was lighting...


I've been looking for lights for the front porch since we moved in. Finally, this week, I found something that I liked from Hinkley Lighting. These are from the Tahoe collection, and I think that they'll go very nicely with our front door. Our current light is bent, rusted, and cracked, so these should be a huge improvement! I can't wait until they arrive. I ordered them from Lightingshowplace.com, because they were the only online lighting store that I could find that had a reasonable return policy (no restocking fee, 30 days to decide) and free shipping, plus I found a coupon code that saved me $20 on my order!

This lantern will hang next to the front door. We've had a hard time finding something that would work in this narrow space. And I'm still looking for a cool Arts and Crafts style vertical wall mailbox, if you have any suggestions. I love the Post wood vented mailbox from Crafthome.com but it's too wide- we need one about 7 or 8 inches wide.

Finding a cool overhead flush mount fixture for the porch ceiling has been the biggest challenge. I didn't want something that would hang down b/c the original, pretty stained beadboard ceiling is marred from the current flush mount overhead fixture. (A Builder's Basic or whatever from Home Depot- seriously like $12.99 and frightfully ugly.) I really like this one. Hinkley had a great selection if this is something that you're searching for also! I'll let you know how I like the company when these come in. Have a great weekend.

Saturday, September 03, 2005

Rot Repair

Well, Blogger ate this the first time, and it took me awhile to bring myself to rewrite it. Please bear with me, it was really witty the first time I wrote it!
After we got the porch stripped and sanded, it was time to address the rot issue that got us in this predicament in the first place. Aaron started by removing the trim to get to the rotten boards, using various tools of destruction including hammers and pry bars of various sizes. He also ended up needing several cans of wasp spray, as several of the little buggers didn't like being so rudely evicted from their nice cozy home in our eaves. I managed to avoid their stings, but Aaron wasn't so lucky. Good thing he's not allergic to bee stings!
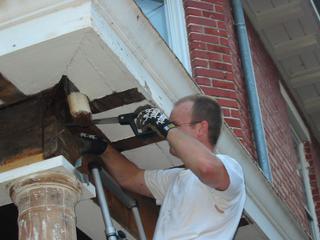
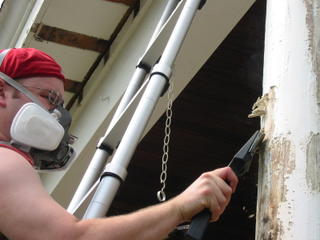
Here is Aaron prying off an area of the trim to get at the rot. (above)

After we got the boards off, it turns out that there was quite a bit more rot than we had initially realized. This picture, taken from the ground looking up shows the giant gaping hole where Aaron removed rotten wood.
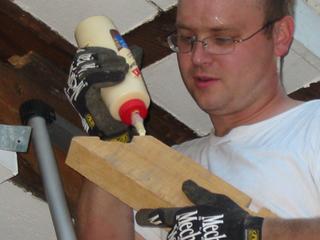
Aaron wasn't quite sure how to address the extensive rot to our big oak porch roof support beam, but with a little help from our friendly housebloggers, especially Bill at Enon Hall, and a trip to a Woodcraft, cool woodworking shop in Towson, MD, Aaron was able to devise a plan. Here he is with a new piece of wood to patch the rotten area in the support beam. He used wood glue and lots of crinkly fastners and nails to attach it to the beam.
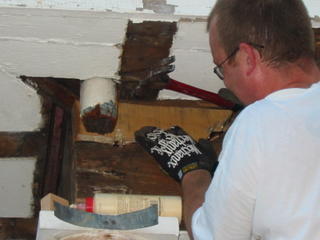

Aaron thinks that the fix is really ugly and while he feels that it's extremely sturdy, he worries about the next owner seeing it 90 years from now. Hopefully, it's sturdy enough, and the new gutters that we're getting work well enough that no one will ever have to see it again!
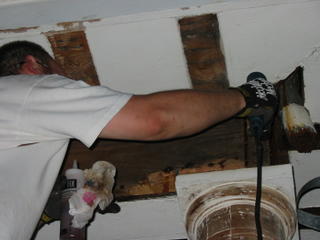

Aaron stabilized everything with our good friend Rot Fix, which was rather runny and messy. I'm a polymer scientist by trade, and Aaron is a chemical engineer, so you'd think that we would be able to come up with a better application method, (or a better product) but you'd be wrong. Anyway, he ended up drilling some small holes and injecting the Rot Fix into the wood with a syringe and needle. Hopefully that will stabilize everything. He filled everything that needed it with Sculpwood and sanded it smooth.
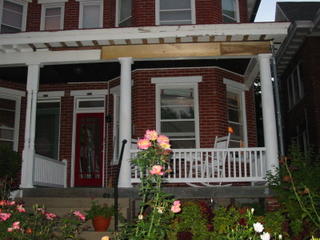
Aaron finished up by cutting new trim boards and nailing them into place. He had a lot of trouble getting things to fit, due to warping in the boards themselves, and in trying to measure big pieces single-handedly on a ladder while I was at work. He finally gave up on mitered joints and just did a regular end-exposed (what the technical word for that?) joint. We then primed the rest of the porch. It looks so much better even to be at this stage, I just don't even know how to describe it. Maybe by the block party Sept 24th, we'll have this project completed! That's our goal, anyway!

We were able to pick up the new dental mold pieces from Ingalls on Monday afternoon (over $100 just in lumber, but it's nice fragrant cedar), and stocked up on their 25% off tool sale while we were there, getting Aaron a new cordless drill (our poor Dewalt's battery is in such bad shape that you can drive about 2 screws before it dies on us, it was just time for a new one), a grinder, which he has been hinting about for awhile now, and a Sawzall, which will come in handy for our basement remodel and eventual back porch demolition.

Monday afternoon, we got the lattice frame built and lattice attached for the front side of the porch. Hopefully, we'll get some work done on the lattice frame for the other side of the porch, too. We ended up using the white vinyl small hole privacy lattice with white vinyl frame that they sell at Home Depot. We both agreed that regular wood lattice looks much better, but couldn't seem to agree on which one of us would paint the wood lattice every year or so. The best compromise was the vinyl, although we try hard not to use too many plastic products on our house. We can get away with saying we wanted the two sides of the house to match, as it's the same stuff our neighbor used.

As for the column base, you may remember that I posted about needed to replace one of the rotten column bases here last month. We've been looking that whole time, even looking at special order options (all of which seem to be that plastic stuff) but we cannot find anything that comes in the dimensions that we need. We're really limited b/c we cannot trim the columns at all due to where the porch rails come up to meet them, and most of the bases are 5" or more tall. We need a base that's 4" tall. I suppose we could raise everything an inch and trim off the tops of the columns, but I'd like to see if we can do anything with the column base we've got before we go to that extreme. I think that it might be hard to get everything to look nice and level again, and we've been to a lot of trouble to strip and sand all of this stuff.

One last thing... I'm thinking of painting just the hand rail of the porch a nice taupey-beige, and then of course, everything else white. Several of my neighbors did this, and it looks nice. However, the other half of the house has an all-white porch. Do you think that would look bad? I thought that it would look nice with the red front door. Please comment if you have an opinion!

The Black Hole

Blogger, why do you eat my posts? :(

The Exterior Paint Stripping Experience

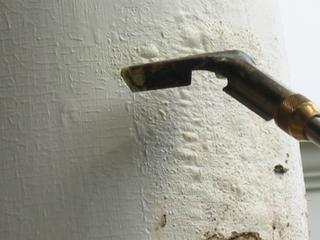
I have seen a lot of posts about interior paint stripping to expose stained wood trim using a heat gun, chemical methods, or the various infrared heat gun methods. I have not seen any posts on stripping exterior paint, such as on porch posts and rails. Please allow me to give you a little background as to how we got ourselves into this project. As usual, it all started with something relatively simple. Aaron noticed that water was pooling on top of our front porch roof and surmised that the gutter must be clogged. He borrowed a ladder from a neighbor and disconnected the gutter external part of the gutter and used a hose to flush out the internal gutter segment to remove the clog, which all worked quite well. While he was up there, he started poking around at the trim around the porch. He very quickly realized that problems with the gutter have probably plagued the house for some time, and it appeared that the years of water had started us out on a nice case of rot, which a PO had fixed by nailing a board over the rotten area of the porch trim. Aaron removed the board, and found that the wood was dry, but very, very soft. Our neighbor suggested that if we were going to have to replace the trim on the corner, we should consider stripping off the approx. 1/4" thick paint caked on the porch while we were at it. He and his wife and done this about 5 years ago, using heat guns and scraping very, very carefully. We decided to undertake the project (The ugly porch paint had also been bothering me since we had moved in, so I jumped on rather naively.) and went to Home Depot and purchased two heat guns, both Milwaulkee brand, and a bunch of scrapers, along with some respirators to protect ourselves from the certainty of lead paint. After about a month of extruciately hot, slow progress, another neighbor suggested that we switch to a blowtorch. We asked around, and while this is a dangerous method, it is much faster than the heat gun. Keep a garden hose handy and don't torch any area that you know may have dry rot. We don't accept any responsibility for anything that you choose to do on your own. This is simply presented here to relate our experience and hopefully help you out. I don't have much in the way of before pics, but this is a middle of the project shot-

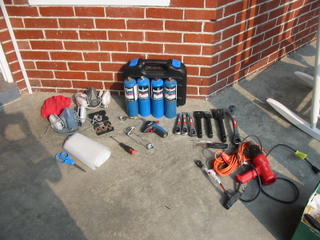
Here is a shot of our work prep. area, where I assembled the following-

Respirators, propane, propane torch with fan attachment, assorted scrapers, torch lighter, scissors, plastic (to protect work area), extension cords, heat gun (I still use the heat gun b/c I'm scared of the torch), and a screwdriver (to change blades on the scraper). Not shown- garden hose or fire extinguisher.

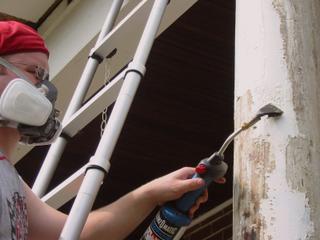
Basically, you use the torch just like the heat gun, aiming it at the area of paint that you desire to strip, keeping it moving all the time, and stopping when the paint starts to bubble and get toasty, as shown below. If you see smoke, stop!

Aaron demonstrates this technique from a different angle. You can use your left hand to hold the torch and your right hand to scrape if you're really efficient.


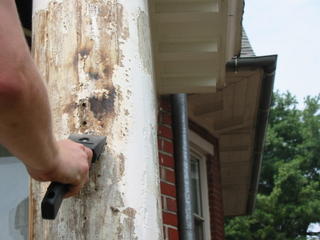
Scraping (see how thick that paint was?) as with anything else, you have to be careful not to gouge the wood. The more paint that you get off, the better. We took most of the porch back to bare wood. The primer used in 1915 is like Play-Doh when it gets hot, and it sticks like white on rice. We were unable to remove ALL of the primer from the wood, but we got a lot of it.


This technique can leave some char on the wood. This char must be sanded or scraped off or paint will not adhere to your new porch and you will have to start back over. We found out mid-project that our neighbors who suggested this project actually had this situation when they moved in, and were only stripping off the two layers of paint that were put back on the porch after their POs torched and scraped the porch.

I used a Black and Decker mouse sander, regular sandpaper, and a Ryobi detail sander to get in all the little crevices, especially in the porch railing. I used medium grit sandpaper in all instances. Aaron used our large Porter Cable random orbital sander with 60 grit sandpaper on the columns and flat areas of the porch trim. A different neighbor is doing this to his back porch, and he actually disassembled the railings to make stripping and sanding them easier.


Here is the porch after stripping, scraping, and sanding. You can see the water damage to the corner as a dark, discolored area in the photograph.


Coming up... attempting to fix the water damage.